Are you a fan of Wendy Vecchi and her Studio 490 line of stamps, stencils, inks, etc.? I am and follow a
MakeART group on Facebook. This month's challenge is to use at least one of Wendy's products on a monochromatic artwork. Uh oh. The hostess chose
brown for her theme; I don't want to copy her. Hmmm...love
red...wonder what I have in my stash that would work????? Ah ha! Art Parts!
Ingredients: gesso, distress inks, distress paints, Adirondack markers, Crackle Embossing Paste, clear embossing ink, clear embossing powder, gold foliage pieces, Clearly For Art (white), Art Parts (Birds With Wings, fence section), stencils (Basically Bricks, Dots & Stripes Borders), Vintage Mesh background stamp, stamp sets (All About Art, Dimensional Rose Art, Daisy Art), Sizzix Easter Elements (bow), Suze Weinberg's Mini Mosaics, Glossy Accents, alcohol inks,
red gem, Vintaj Patina
I can't step-by-step this process because I just kept playing and layering until I was happy but I did use
EVERY red/
pink available in the mediums above. The bird, wings, and legs were coated with gesso first so that anything else I added would not soak in and be a more true color. I love the striped leggings...inked, stenciled and stamped.
F
redbird will be residing in one of the many windows on my porch. Birds frequently slam into them thinking they can go through my house instead of flying around or over it.

 Sizzix
mini cardinal, Birch Trees; Stampers Anonymous Simple Sayings CMS156;
Ranger Jet Black, Vermillion Archival Inks, Adirondack Stonewashed Ink,
Diamond Stickles; Bazzill cardstocks (white, red, blue)
Sizzix
mini cardinal, Birch Trees; Stampers Anonymous Simple Sayings CMS156;
Ranger Jet Black, Vermillion Archival Inks, Adirondack Stonewashed Ink,
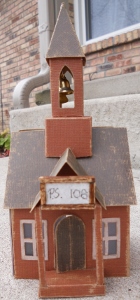
Diamond Stickles; Bazzill cardstocks (white, red, blue) A very mini village dwelling made from shrink plastic!


 NOT your traditional anniversary card! Every once in a while I get a wild hair and make something totally unexpected for my sister's anniversary. She and her husband know to never guess what type of card I might send. Good thing, huh?


 Sadly I had the need to create another sympathy card. The woman worked for a florist at one time so I thought watercoloring some of Tim's stamps from 'Flower Garden' CS215 would be perfect.
 Sympathy cards can be quite difficult. Do you create a card that speaks of the individual? Religious? Masculine or feminine? Generic? I try to incorporate something about the deceased if I can. If not, then at least something that speaks to me so that making the card is not a dreadful chore.


 My Brazilian grandson (his mother was an exchange student with us in the latter part of the '90s) turns 3 today. I don't have many children-related stamps but thought wild animals might be to his liking.
 Sometimes I just 'shop' from my own shelves and drawers...I certainly have plenty of things tucked away and need to use them, not hold onto them for that 'perfect' project.
 While the card may look very wedding-ish to you I don't see why it can't be for anniversaries as well. I saw this card on Pinterest and made some minor changes. I used a rubber stamp to create the letters; the original used alphabet and shape beads. Not sure what they used for the ring but I coiled wire into a circle and used a heavy duty glue dot to keep it in place.


