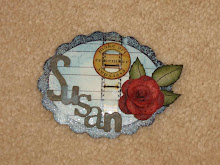
My plate has been overflowing with my husband's health situation and wasn't even sure I was going to be able to get this month's Tim Holtz tag created. I had the idea early on, just no energy or time until yesterday when I made myself take a break and as Nike says 'just do it'!
Sizzix: Calendar Words: Script, Celebration Words: Block, Alphanumeric 3/4"
Stampers Anonymous: CMS 145 Americana Blueprint
Ranger: Jet Black Archival Ink, distress watercolor cardstock, #8 kraft tag, distress inks (Ground Espresso, Barn Door), distress markers (Barn Door, Faded Jeans, Wild Honey, Ground Espresso), distress stains (Vintage Photo, Hickory Smoke), Micro Glaze
Advantus: Idea-ology-tag token
misc.: twine, Gold Encore pigment ink (Tsukineko), star brad, fireworks stamp (A Country Welcome)
I wonder what remix techniques Tim will combine for August's tag?
************
PS...what settings do I need to use so that my entire tag shows up in the link on Tim's blog? I tried making my image smaller but still only see a tiny portion. Hope someone can tell me how to make the necessary changes.
Showing posts with label Advantus. Show all posts
Saturday, July 30, 2016
Thursday, June 23, 2016
Love you to the moon and back!
#29 years of that wedded bliss stuff (and counting!)...happy anniversary to my best friend and soulmate!
The base card is white; the dark blue layer has flecks of silver imbedded...almost look like millions of tiny stars. I covered a sheet of mixed media cardstock with gesso before applying yellow distress paints. Tarnished Brass distress mica spray onto a damp sea sponge creates a unique texture. I ran the cardstock through the Crescent Moon & Stars Sizzix die cut and glued to the blue layer with matte Multi Medium. A bit of graphite pencil was used to darken the left edges of the stars and moon for extra dimension. White distress crayon was rubbed all over the blue layer to soften the color and make it look more ethereal. A Marvy punch was used on red Bazzill cardstock to cut out the heart. It dangles from the tip of the moon with a bit of hemp twine. The left edge also was smudged with a graphite pencil, the right edge with the white distress crayon.
Tuesday, June 14, 2016
Use your wings...fly away
It's time for another technique remix from Tim! This time he chose Tissue Wrap Collage from January 2015 and Stencil Plaid from June 2015.
I don't have the plain tissue wrap but went with the Terminology tissue wrap already on my desk. I also don't have the new substrate he used so I substituted sticky-back canvas. Isn't the vintage distress collage medium cool? Love the effect! Not to copy, I selected the feather (Feather Duo die) and mini stencil 24 (chevron)...this looked like a better fit for the feather.
Because I was too lazy to go downstairs and uncover my sewing machine (and the piles on it!) I did the Feather Stitch by hand using some embroidery thread to coordinate with the colors I chose for my tag (Frayed Burlap, Cracked Pistachio, Mermaid Lagoon).
My embellishments include a Token Tag (Mermaid Lagoon distress paint rubbed into the lettering) and Botanical Remnant rub-ons. The silk ribbon was from a package I recently received The Funkie Junkie. (She always included the coolest little envelopes filled with ephemera and tied up with a bit of hand-dyed silk ribbon.) Using one of the Crazy Bird stamps and dies was a must for this theme! The bird also got the Stencil Plaid technique used on it.
While Tim's tag would make a great Father's Day card or fit the bill for any masculine card, I really wanted to create my own version and not copy his. Besides, my father is no longer here on earth and I had already made my step-father a card to recognize his place in my life.
I hope you're enjoying the technique remixes monthly challenge!
I don't have the plain tissue wrap but went with the Terminology tissue wrap already on my desk. I also don't have the new substrate he used so I substituted sticky-back canvas. Isn't the vintage distress collage medium cool? Love the effect! Not to copy, I selected the feather (Feather Duo die) and mini stencil 24 (chevron)...this looked like a better fit for the feather.
Because I was too lazy to go downstairs and uncover my sewing machine (and the piles on it!) I did the Feather Stitch by hand using some embroidery thread to coordinate with the colors I chose for my tag (Frayed Burlap, Cracked Pistachio, Mermaid Lagoon).
My embellishments include a Token Tag (Mermaid Lagoon distress paint rubbed into the lettering) and Botanical Remnant rub-ons. The silk ribbon was from a package I recently received The Funkie Junkie. (She always included the coolest little envelopes filled with ephemera and tied up with a bit of hand-dyed silk ribbon.) Using one of the Crazy Bird stamps and dies was a must for this theme! The bird also got the Stencil Plaid technique used on it.
While Tim's tag would make a great Father's Day card or fit the bill for any masculine card, I really wanted to create my own version and not copy his. Besides, my father is no longer here on earth and I had already made my step-father a card to recognize his place in my life.
I hope you're enjoying the technique remixes monthly challenge!
Saturday, February 14, 2015
Happy Valentine's Day!
I thought Tim's February tag for 2015 was the perfect venue to send my sweetie a whole bunch o' love. He's brought me such great joy over the past 32 years. Our initials are here as well as other special reminders of our life together.
#8 manila tag, tissue tape, flash cards, mini movers & shapers heart die, Picket Fence and Barn Door distress paints, Frayed Burlap distress marker, Glue 'n Seal, stick, crinkle ribbon, industrious sticker, lace, mica, brad, distressables paper, wallflower stash, photo sticker
Hope you have someone just as special in your life!
#8 manila tag, tissue tape, flash cards, mini movers & shapers heart die, Picket Fence and Barn Door distress paints, Frayed Burlap distress marker, Glue 'n Seal, stick, crinkle ribbon, industrious sticker, lace, mica, brad, distressables paper, wallflower stash, photo sticker
Hope you have someone just as special in your life!
Friday, January 30, 2015
February technique calendar
Roni chose a rather interesting technique for February...the use of petroleum jelly. When you try this technique for yourself, please note that thinner paints work much better than thicker ones. I used distress paints but watered them down.
Ranger: distress paints (Frayed Burlap, Worn Lipstick, Milled Lavender, Festive Berries); Potting Soil Archival Ink; Black Fude Ball Pen; distress stains (Worn Lipstick, Milled Lavender, Festive Berries)
Marvy heart punch; old book page
Advantus/Idea-ology: washi tape
February is a special month for me. My birthday, the day I met my future husband, our first date and Valentine's Day...all within the same week! Needless to say, I LOVE February!
Ranger: distress paints (Frayed Burlap, Worn Lipstick, Milled Lavender, Festive Berries); Potting Soil Archival Ink; Black Fude Ball Pen; distress stains (Worn Lipstick, Milled Lavender, Festive Berries)
Marvy heart punch; old book page
Advantus/Idea-ology: washi tape
February is a special month for me. My birthday, the day I met my future husband, our first date and Valentine's Day...all within the same week! Needless to say, I LOVE February!
Monday, January 5, 2015
Tissue paper and paint
I haven't played with Tim's Tissue Wrap in a while...no reason, guess I just have soo much stuff I don't know what to use first or else just forget what all I do have tucked away. Sigh. But fortunately there are plenty of challenges to help jumpstart my creativity or get me to use products unknown or stashed away.
Claudine's latest challenge is to play with the tissue wrap and acrylic paint.
Advantus/Idea-ology Tissue Wrap; Ranger (distress paints, distress markers, Glossy Accents, Jet Black Archival Ink, Adirondack markers, Stickles); water color paper; Studio 490 Art Fit For A Queen LCS040; Impression Obsession B1233 (sentiment); All Night Media (image)
Claudine's latest challenge is to play with the tissue wrap and acrylic paint.
Advantus/Idea-ology Tissue Wrap; Ranger (distress paints, distress markers, Glossy Accents, Jet Black Archival Ink, Adirondack markers, Stickles); water color paper; Studio 490 Art Fit For A Queen LCS040; Impression Obsession B1233 (sentiment); All Night Media (image)
Wednesday, December 24, 2014
Candlelight trio
These are much safer than real candles! The entire display is approximately 9" across by 3 1/2" high. I do have a small cardboard rectangular block behind the candles to allow them to stand upright.
Grungeboard, kraft core core'dinations, distress paints (antique linen, scattered straw, wild honey), brown distress ink, Sizzix dies (distressed doily, tattered pinecone, candlelight, holiday greens, mini poinsettia), Glossy Accents, butterscotch alcohol ink, pearls (flower centers)
Hope your Christmas is merry and bright!
Grungeboard, kraft core core'dinations, distress paints (antique linen, scattered straw, wild honey), brown distress ink, Sizzix dies (distressed doily, tattered pinecone, candlelight, holiday greens, mini poinsettia), Glossy Accents, butterscotch alcohol ink, pearls (flower centers)
Hope your Christmas is merry and bright!
Sunday, December 14, 2014
A woodlands Merry Christmas
I went all out for the current CCC#3 (check here to see what you need to do to enter) challenge using Tim's Woodlands and Tinsel Twine. I was determined to use as many holiday dies as possible. It took 3 photos to capture all the elements.
Don't forget there's an awesome assortment of goodies awaiting one lucky winner chosen by the Curiosity Crew and a $50 gift certificate to The Inspiration Emporium to a randomly selected winner. These challenges are such fun and make me use the products I've acquired instead of hoarding them. Surely I'm not the only one guilty of this! lol
Ranger: distress inks, embossing powders, paints, stains; clear embossing ink & powder; archival inks
Sizzix: Old Jalopy, Prancing Deer, Reindeer Flight, Sleigh Ride, Hanging Sign (Bigz dies); deer, cardinal, pine tree (mini mover & shaker dies); Holiday Words-Script (thinlits); recycled packaging
Stampers Anonymous: Christmas Nostalgia CMS207, Wallpaper & Wood CMS126
Hero Arts Lower Case alpha stamps
Advantus (Idea-ology): jump rings, hitch fasteners, Woodlands, Tinsel Twine-Winter
Misc: white gesso, watercolor paper, ribbon, Epsom Salts (snow!!!), wood dowel and fence, twine
The base is a corrugated cardboard box lid cut to size. Watercolor paper was cut to size. Various white and blue distress inks and paints were used to color it. Stamp snowflake background in Shaded Lilac distress ink. Adhered to box with double-stick tape.
Using Sizzix die packaging I cut a tray to fit the bottom. Painted it with white gesso and left the front bumpy. It was adhered using double-stick tape. Fill with Epsom Salts to resemble snow. Even the lumps were kept.
Cut all the dies multiple times out of chipboard or grunge board. Multi Medium (Matte) was used to adhere the layers. Color and sand the edges.
Completed size: 6"D x 12" W x 8" H
If you haven't purchased your tree or a wreath for the front door yet, maybe you'll go to this site and feed the reindeer while you're there! Thank you for st(h)opping!
Don't forget there's an awesome assortment of goodies awaiting one lucky winner chosen by the Curiosity Crew and a $50 gift certificate to The Inspiration Emporium to a randomly selected winner. These challenges are such fun and make me use the products I've acquired instead of hoarding them. Surely I'm not the only one guilty of this! lol
Ranger: distress inks, embossing powders, paints, stains; clear embossing ink & powder; archival inks
Sizzix: Old Jalopy, Prancing Deer, Reindeer Flight, Sleigh Ride, Hanging Sign (Bigz dies); deer, cardinal, pine tree (mini mover & shaker dies); Holiday Words-Script (thinlits); recycled packaging
Stampers Anonymous: Christmas Nostalgia CMS207, Wallpaper & Wood CMS126
Hero Arts Lower Case alpha stamps
Advantus (Idea-ology): jump rings, hitch fasteners, Woodlands, Tinsel Twine-Winter
Misc: white gesso, watercolor paper, ribbon, Epsom Salts (snow!!!), wood dowel and fence, twine
The base is a corrugated cardboard box lid cut to size. Watercolor paper was cut to size. Various white and blue distress inks and paints were used to color it. Stamp snowflake background in Shaded Lilac distress ink. Adhered to box with double-stick tape.
Using Sizzix die packaging I cut a tray to fit the bottom. Painted it with white gesso and left the front bumpy. It was adhered using double-stick tape. Fill with Epsom Salts to resemble snow. Even the lumps were kept.
Cut all the dies multiple times out of chipboard or grunge board. Multi Medium (Matte) was used to adhere the layers. Color and sand the edges.
Completed size: 6"D x 12" W x 8" H
If you haven't purchased your tree or a wreath for the front door yet, maybe you'll go to this site and feed the reindeer while you're there! Thank you for st(h)opping!
Labels:
Advantus,
Hero Arts,
Ranger,
Sizzix,
Stampers Anonymous
Wednesday, November 26, 2014
Who are you?
As soon as I saw Linda Ledbetter's post about the newest CCC3 challenge I knew what layering stencils I wanted to use. Whew! Sometimes I overthink these challenges but this time my hands and heart just flew through the whole process.
Stampers Anonymous Phrases 2 HC006 and Jet Black Archival Ink; layering stencils (woodgrain, measured, speckles); distress inks; clear embossing ink and powder; copper embossing powder; leaves and acorn mini mover & shapers dies; token/jump ring/distress paint; ribbon; Botanical Remnant Rub
You'll have to check out Tim's latest book (see page 50) to learn more about the technique. I used several older techniques on this tag (spritz & flick, distressed edges); they are always winners in my book.
And don't forget the big prize from Tim & Mario that you'll get if you're chosen by the Curiosity Crew. Wowza! And it gets better! The Funkie Junkie is sponsoring the challenge and has a $25 gift certificate to their on-line store to a randomly chosen artist! It's fun shopping with Linda Coughlin and she always includes some really neat freebies with your order.
Hope to see your art in the gallery!
Stampers Anonymous Phrases 2 HC006 and Jet Black Archival Ink; layering stencils (woodgrain, measured, speckles); distress inks; clear embossing ink and powder; copper embossing powder; leaves and acorn mini mover & shapers dies; token/jump ring/distress paint; ribbon; Botanical Remnant Rub
You'll have to check out Tim's latest book (see page 50) to learn more about the technique. I used several older techniques on this tag (spritz & flick, distressed edges); they are always winners in my book.
And don't forget the big prize from Tim & Mario that you'll get if you're chosen by the Curiosity Crew. Wowza! And it gets better! The Funkie Junkie is sponsoring the challenge and has a $25 gift certificate to their on-line store to a randomly chosen artist! It's fun shopping with Linda Coughlin and she always includes some really neat freebies with your order.
Hope to see your art in the gallery!
Sunday, November 23, 2014
Wintry blast
Claudine is using another technique on this week's challenge for the Altered Playing Cards. It's also about recycling. She often uses paper towels under her work when she uses sprays. So why not take those towels and create art?
On this card I glued the towel directly to the gesso'd playing card. Studio 490 embossing paste was used on Tim's Holiday Knits layering stencil and Clear Rock Candy Distress Stickles Dry Glitter was sprinkled over the top; let dry. The JustRite stamps are pre-inked.
I tried to get the sprayed towel to transfer to the card but it wasn't happening so I sprayed the same colors onto the card and let them dry. Same effect, just darker. The earlier effect was way too pale. On watercolor paper I stamped the boy and snowman; colored with distress markers. Cut out and applied texture paste to the snow at the bottom of the card. The sentiment (My Sentiments Exactly M373-IO) was stamped in Jet Black Archival Ink. The snowflakes (Mini Holidays 3 CS114) were stamped in Cornflower Blue Archival Ink.
We had snow flurries last week and more are on tap for this week. I'm more than ready for the air to get clear and dry and watch the flakes pile high and glisten.
On this card I glued the towel directly to the gesso'd playing card. Studio 490 embossing paste was used on Tim's Holiday Knits layering stencil and Clear Rock Candy Distress Stickles Dry Glitter was sprinkled over the top; let dry. The JustRite stamps are pre-inked.
I tried to get the sprayed towel to transfer to the card but it wasn't happening so I sprayed the same colors onto the card and let them dry. Same effect, just darker. The earlier effect was way too pale. On watercolor paper I stamped the boy and snowman; colored with distress markers. Cut out and applied texture paste to the snow at the bottom of the card. The sentiment (My Sentiments Exactly M373-IO) was stamped in Jet Black Archival Ink. The snowflakes (Mini Holidays 3 CS114) were stamped in Cornflower Blue Archival Ink.
We had snow flurries last week and more are on tap for this week. I'm more than ready for the air to get clear and dry and watch the flakes pile high and glisten.
Monday, November 17, 2014
Cabinet pocket cards
I have a lot of cabinet card photos in my family history collection so having Tim create pockets we could use with new photos was a great idea! The current CCC3 challenge is to use a cabinet card in your art. Tim has 2 sizes; I chose the smaller one for my project.
6x6 grungebook page (TH92879); Vintage Shabby Paper Stash; Mini Cabinet Cards (TH93118); distress paint (Antique Linen, Spun Sugar); archival inks (Jet Black, Fern Green, Watering Can); Nature Walk (CMS181); distress ink (Tattered Rose, Gathered Twigs, Shabby Shutters, Spun Sugar); clear embossing powder; Hero Arts alpha & numeric stamps; Studio 490 stencils (Classic Words, From The Garden); Studio 490 Metallic Silver Embossing Paste; Studio 490 stamp (Art Parts LCS014)silk ribbon; Remnant Rub (TH93120); EKSuccess Scrabble Crossword Stamps
Not only do I get a challenge project completed but I scrapbook a part of my life. The entry also allows me the chance to win some goodies from Tim & Mario (as chosen by the Curiosity Crew) and a $50 gift certificate from The Inspiration Emporium, this week's sponsor.
The grungebook page was painted with a base coat of Antique Linen Distress paint; distressed the edges and rubbed Gathered Twigs Distress Ink along them. Studio 490 Leaf Spray was stenciled in the two left corners; and a Studio 490 frill was stamped in Spun Sugar over the spray.
The decorative cardstock was trimmed to size, distressed the edges with the sanding block then added Tattered Rose and Gathered Twigs Distress Inks to the white edges. Stamped the date in Fern Leaf Archival Ink at the top; embossing paste the word at the bottom. Added a photo of the bowl (same as in the photo) and a stamped and embossed image of a spoon.
Aged the cabinet card, added the photo, faux Scrabble tiles and Remnant Rub. The bow is attached to a colored and distressed tag that tells the story behind the photo.
This picture was taken in the kitchen of my maternal grandparents' home in northwestern Illinois. I've eaten many a meal at that table..which is still in the family. The bowl is part of a set that they acquired when going to the movies back in the '30s and '40s. The flatware is Queen Bess Silver Plate. When my grandparents died I was given the dishes and flatware. The dishes only come out on special occasions because they are not dishwasher-safe. The flatware requires silver polish periodically but we use it every day. Thank you, grandpa and grandma, for giving me such wonderful, lasting memories!
6x6 grungebook page (TH92879); Vintage Shabby Paper Stash; Mini Cabinet Cards (TH93118); distress paint (Antique Linen, Spun Sugar); archival inks (Jet Black, Fern Green, Watering Can); Nature Walk (CMS181); distress ink (Tattered Rose, Gathered Twigs, Shabby Shutters, Spun Sugar); clear embossing powder; Hero Arts alpha & numeric stamps; Studio 490 stencils (Classic Words, From The Garden); Studio 490 Metallic Silver Embossing Paste; Studio 490 stamp (Art Parts LCS014)silk ribbon; Remnant Rub (TH93120); EKSuccess Scrabble Crossword Stamps
Not only do I get a challenge project completed but I scrapbook a part of my life. The entry also allows me the chance to win some goodies from Tim & Mario (as chosen by the Curiosity Crew) and a $50 gift certificate from The Inspiration Emporium, this week's sponsor.
The grungebook page was painted with a base coat of Antique Linen Distress paint; distressed the edges and rubbed Gathered Twigs Distress Ink along them. Studio 490 Leaf Spray was stenciled in the two left corners; and a Studio 490 frill was stamped in Spun Sugar over the spray.
The decorative cardstock was trimmed to size, distressed the edges with the sanding block then added Tattered Rose and Gathered Twigs Distress Inks to the white edges. Stamped the date in Fern Leaf Archival Ink at the top; embossing paste the word at the bottom. Added a photo of the bowl (same as in the photo) and a stamped and embossed image of a spoon.
Aged the cabinet card, added the photo, faux Scrabble tiles and Remnant Rub. The bow is attached to a colored and distressed tag that tells the story behind the photo.
This picture was taken in the kitchen of my maternal grandparents' home in northwestern Illinois. I've eaten many a meal at that table..which is still in the family. The bowl is part of a set that they acquired when going to the movies back in the '30s and '40s. The flatware is Queen Bess Silver Plate. When my grandparents died I was given the dishes and flatware. The dishes only come out on special occasions because they are not dishwasher-safe. The flatware requires silver polish periodically but we use it every day. Thank you, grandpa and grandma, for giving me such wonderful, lasting memories!
Labels:
Advantus,
EKSuccess,
Ranger,
Stampers Anonymous,
Studio 490
Friday, November 14, 2014
Leaf
I tried to come up with a different theme for Tim's November tag but my mojo seemed to have jumped ship. So I followed Tim's lead, had fun with it and was pleased with the results. Why knock what works?
Here's my base tag...really hated to cover it up. Oh well. I used Peeled Paint, Forest Moss, Mustard Seed, Scattered Straw, Wild Honey, Spiced Marmalade and Barn Door distress paints.
And here's the finished product.
#8 tag, corrugated cardboard
Burlap layering stencil
Gathered Twigs, Walnut Stain distress inks
Melted Chocolate Dylusions Sprays
Heirloom Gold Perfect Pearls Mist
Tarnished Brass distress paint on alpha parts and arrow sticker
Industrious sticker, vial label, remnant rub, alpha parts, ribbon remnants, foil linen ribbon colored with watered down distress paints
Layered Leaf embossing folder and die set
I'd like to try this with the wings and do it in blues and silvers. Make it more like in memory of a special someone who has left the physical world.
Here's my base tag...really hated to cover it up. Oh well. I used Peeled Paint, Forest Moss, Mustard Seed, Scattered Straw, Wild Honey, Spiced Marmalade and Barn Door distress paints.
And here's the finished product.
#8 tag, corrugated cardboard
Burlap layering stencil
Gathered Twigs, Walnut Stain distress inks
Melted Chocolate Dylusions Sprays
Heirloom Gold Perfect Pearls Mist
Tarnished Brass distress paint on alpha parts and arrow sticker
Industrious sticker, vial label, remnant rub, alpha parts, ribbon remnants, foil linen ribbon colored with watered down distress paints
Layered Leaf embossing folder and die set
I'd like to try this with the wings and do it in blues and silvers. Make it more like in memory of a special someone who has left the physical world.
Thursday, November 6, 2014
Believe
Time's a wasting but my idea kept changing with the color palettes that weren't what I wanted. But so glad I kept at it as this is perfect now for the CCC3 14th challenge hosted by Linda Ledbetter. This challenge is sponsored by Linda Coughlin aka The Funkie Junkie. There will be a winner of a $25 gift certificate to the FJ on-line store as well as a Curiosity Crew winner.
This is just one of the many pages that come in Tim's GrungeBook. It's been covered with distress paint, edged with distress ink, stenciled and stamped before I even got to the technique of Colored Crackle on the cameo frame.
The Festive stencil was used on the left hand side (both corners) then flipped over and used on the right hand side corners. The images are subtle but just what I wanted.
6x6 Grungebook
distress paints: Old Paper, Picket Fence, Brushed Pewter
distress inks: Brushed Corduroy, Pumice Stone, Peeled Paint, Forest Moss, Evergreen Bough
archival ink: Red Geranium, Tree Branch
pigment ink: Snow Cap
stamps: Let Your Art Have Wings LCS022 (background stamp)
stencils: Christmas, Festive, Schoolhouse
embossing paste: Studio 490 metallic silver
Clear Rock Candy Distress Crackle Paint and Distress Stickles Dry Glitter, Meadow Alcohol Ink with Clear Rock Candy Distress Stickles Dry Glitter
Sizzix: Tattered Poinsettia Bigz & mini, Holiday Greens Thinlits, Cameo Frame, medium oval, Holiday Words - script
Chipboad, gems, red/green card stock
The photo was taken in the living room of my maternal grandparents' home and celebrates my 2nd Christmas.
This is just one of the many pages that come in Tim's GrungeBook. It's been covered with distress paint, edged with distress ink, stenciled and stamped before I even got to the technique of Colored Crackle on the cameo frame.
The Festive stencil was used on the left hand side (both corners) then flipped over and used on the right hand side corners. The images are subtle but just what I wanted.
6x6 Grungebook
distress paints: Old Paper, Picket Fence, Brushed Pewter
distress inks: Brushed Corduroy, Pumice Stone, Peeled Paint, Forest Moss, Evergreen Bough
archival ink: Red Geranium, Tree Branch
pigment ink: Snow Cap
stamps: Let Your Art Have Wings LCS022 (background stamp)
stencils: Christmas, Festive, Schoolhouse
embossing paste: Studio 490 metallic silver
Clear Rock Candy Distress Crackle Paint and Distress Stickles Dry Glitter, Meadow Alcohol Ink with Clear Rock Candy Distress Stickles Dry Glitter
Sizzix: Tattered Poinsettia Bigz & mini, Holiday Greens Thinlits, Cameo Frame, medium oval, Holiday Words - script
Chipboad, gems, red/green card stock
The photo was taken in the living room of my maternal grandparents' home and celebrates my 2nd Christmas.
Thursday, October 23, 2014
All about love
Claudine's Altered Playing Card Challenge, week 8, is all about love. You can check out the link to follow along with her tutorial of how she created her altered playing cards. The first card uses colors I often find when I bruise so the sentiment came from that thought. (See, you really don't want to go inside my head!) The second was a play on the word 'love'. With it being autumn and the colors of the leaves changing I just wanted to honor their presence. Fall is the most wonderful time of year!
Ingredients: playing card, gesso, Metallic Rub-ons by Craf-T Products, Worn Lipstick distress paint, Sketch & Wash Graphite pencils by General, Botanical Remnant Rubs, Artful Things (CSS27829) - text by Stampers Anonymous, Plum & Cornflower Blue archival inks, Adirondack Pitch Black marker
Ingredients: playing card, gesso, Spiced Marmalade & Peeled Paint & Dusty Concord distress paints, black & white card stock scraps, Autumn Gatherings Sizzix decorative strip die, distress inks, Black Fude Ball Pen by Ranger, white Gelly Roll pen by Sakura
Ingredients: playing card, gesso, Metallic Rub-ons by Craf-T Products, Worn Lipstick distress paint, Sketch & Wash Graphite pencils by General, Botanical Remnant Rubs, Artful Things (CSS27829) - text by Stampers Anonymous, Plum & Cornflower Blue archival inks, Adirondack Pitch Black marker
Ingredients: playing card, gesso, Spiced Marmalade & Peeled Paint & Dusty Concord distress paints, black & white card stock scraps, Autumn Gatherings Sizzix decorative strip die, distress inks, Black Fude Ball Pen by Ranger, white Gelly Roll pen by Sakura
Labels:
Advantus,
Craf-T Products,
General,
Ranger,
Sakura,
Sizzix,
Stampers Anonymous
Wednesday, October 15, 2014
Worn Covers
Doesn't this sound intriguing? How about a nice, cuddly blanket to keep you warm on this cool, damp night? Well think again because it's all about using Tim Holtz's 'Worn Covers' as seen in his book on p. 31. Which means it's time for another challenge over on Linda Ledbetter's blog!
.jpg)
A few rules to follow but they're easy peasy. And some prizes...one from Tim and Mario that will be chosen by the Curiosity Crew and a $50 gift certificate from Inspiration Emporium to a randomly selected winner.
First I taped off the spine's edge and label. I dry-brushed Old Paper distress paint across the front. Mustard Seed distress paint was pounced through the Clockwork Stencil on 2 corners. Texture Paste mixed with Wild Honey distress paint was worked through the Schoolhouse stencil. Peeled Paint distress ink was smushed through the Speckles stencil. 'One of a kind' (Simple Sayings CS155) and the heart (Artful Things CSS27829) were stamped in Red Geranium archival ink. Metallic Decor red dots were added to the sentiment to replace the 'o'. Dry-sponge Brushed Corduroy and Frayed burlap distress paints over entire cover.
Uncover the label. Run a strip of Terminology tissue wrap through the Xyron; ditto for a piece of white card stock. Swipe Barn Door distress ink across the tissue wrap. Using the Alphanumeric Thinlits dies, cut out the words 'tag art' from each. Because there are repetitions of the letters I was able to cut out both words at the same time! Haphazardly paint Barn Door distress stain over the white letters; add a touch of brown distress ink to the edges. Using a black Fude Ball pen and white marker, draw lines indicating shadow and light. Place the solid letters on the label; offset the tissue wrap letters. This looks quite dimensional IRL. Coat with Multi Medium for better adhesion.
A few Botanical Remnant Rubs were strategically placed on the cover. These were also given a light coat of Multi Medium. The Industrial Sticker strip was painted with Barn Door distress paint and dried. Sand lightly; tap Tree Branch and Jet Black archival inks over the strip. Remove the tape on the spine's edge. Place a narrow strip of red-line tape for better adhesion. Add a dab of Multi Medium to each pointy bit; press down firmly.
On the spine I created a 'tag art' stencil. I pounced on Old Paper, Barn Door and Wild Honey distress paints and again used the black and white pens to create shadow and light. IRL this looks raised, not flat.
I attached the large binder ring with brads that had been coated with embossing liquid then covered with Chinese Red Antiquities embossing powder. Sand lightly; tap on Tree Branch and Jet Black archival inks.
Inside are 12 page pockets. I created my own divider pages using plastic packaging cut to size. At the bottom of each is the new ShadowPress Months set. I hope to be able to use this for the 12 Tags of 2015 (please, Tim, keep up the tradition!!!!!!)
I opted to keep the cover rather flat so that I could store it, with others, on my shelf. IRL the yellow in the corners does not stand out at all but is rather muted.
.jpg)
A few rules to follow but they're easy peasy. And some prizes...one from Tim and Mario that will be chosen by the Curiosity Crew and a $50 gift certificate from Inspiration Emporium to a randomly selected winner.
First I taped off the spine's edge and label. I dry-brushed Old Paper distress paint across the front. Mustard Seed distress paint was pounced through the Clockwork Stencil on 2 corners. Texture Paste mixed with Wild Honey distress paint was worked through the Schoolhouse stencil. Peeled Paint distress ink was smushed through the Speckles stencil. 'One of a kind' (Simple Sayings CS155) and the heart (Artful Things CSS27829) were stamped in Red Geranium archival ink. Metallic Decor red dots were added to the sentiment to replace the 'o'. Dry-sponge Brushed Corduroy and Frayed burlap distress paints over entire cover.
Uncover the label. Run a strip of Terminology tissue wrap through the Xyron; ditto for a piece of white card stock. Swipe Barn Door distress ink across the tissue wrap. Using the Alphanumeric Thinlits dies, cut out the words 'tag art' from each. Because there are repetitions of the letters I was able to cut out both words at the same time! Haphazardly paint Barn Door distress stain over the white letters; add a touch of brown distress ink to the edges. Using a black Fude Ball pen and white marker, draw lines indicating shadow and light. Place the solid letters on the label; offset the tissue wrap letters. This looks quite dimensional IRL. Coat with Multi Medium for better adhesion.
A few Botanical Remnant Rubs were strategically placed on the cover. These were also given a light coat of Multi Medium. The Industrial Sticker strip was painted with Barn Door distress paint and dried. Sand lightly; tap Tree Branch and Jet Black archival inks over the strip. Remove the tape on the spine's edge. Place a narrow strip of red-line tape for better adhesion. Add a dab of Multi Medium to each pointy bit; press down firmly.
On the spine I created a 'tag art' stencil. I pounced on Old Paper, Barn Door and Wild Honey distress paints and again used the black and white pens to create shadow and light. IRL this looks raised, not flat.
I attached the large binder ring with brads that had been coated with embossing liquid then covered with Chinese Red Antiquities embossing powder. Sand lightly; tap on Tree Branch and Jet Black archival inks.
Inside are 12 page pockets. I created my own divider pages using plastic packaging cut to size. At the bottom of each is the new ShadowPress Months set. I hope to be able to use this for the 12 Tags of 2015 (please, Tim, keep up the tradition!!!!!!)
I opted to keep the cover rather flat so that I could store it, with others, on my shelf. IRL the yellow in the corners does not stand out at all but is rather muted.
Wednesday, October 8, 2014
Altered playing cards - week 6
It's time for another round of altering playing cards with Claudine. She's chosen the theme of Halloween for week 6. Fall is my favorite time of year so the color palette and ideas seem to come to me rather quickly.
Top card: Claudine Helmuth Studio Paint in Altered Orange, tissue tape, Mini Halloween CMS093 stamp set, Versamark Ink, SuperFine Detail Black Embossing Powder, Jet Black & Vermillion Archival Inks, Black Fude Ball Pen, White Sakura Gelly Roll Pen, Matte Medium
Bottom card: Adirondack Sprays in Butterscotch, Terra Cotta & Pesto, Halloween & Shatter Stencils, Mini Halloween CMS093 & Mini Halloween 2 CMS113 stamp sets, Jet Black Archival Ink, Studio 490 Black Embossing Paste, watered down black acrylic paint
Top card: Claudine Helmuth Studio Paint in Altered Orange, tissue tape, Mini Halloween CMS093 stamp set, Versamark Ink, SuperFine Detail Black Embossing Powder, Jet Black & Vermillion Archival Inks, Black Fude Ball Pen, White Sakura Gelly Roll Pen, Matte Medium
Bottom card: Adirondack Sprays in Butterscotch, Terra Cotta & Pesto, Halloween & Shatter Stencils, Mini Halloween CMS093 & Mini Halloween 2 CMS113 stamp sets, Jet Black Archival Ink, Studio 490 Black Embossing Paste, watered down black acrylic paint
Labels:
Advantus,
Ranger,
Stampers Anonymous,
Studio 490,
Tim Holtz
Saturday, April 19, 2014
My version of Tim Holtz's April tag
I really had to wait for more spring-like weather to get my mojo going this month. Our temps have been on a rollercoaster...70s one day, snow the next. You get the picture.
Ingredients: Idea-ology paper stash 'Vintage Shabby', philosphy tag, mini pin, jump ring; tissue tape; #8 tag; coffee cup holder, grungeboard; distress paints (spun sugar/mustard seed/squeezed lemonade/peeled paint); distress inks (pumice stone/worn lipstick/tea dye); silk ribbon; Sizzix (tattered pine cone bigz die, honeycomb frameworks die); collage glue stick; Multi-Medium; hot glue;recycled acetate packaging; alcohol inks
You can see Tim's version here.
Pine cone to a rose...sometimes this works first time, no fiddling; other times I could just pull my hair out (not attractive!) trying to get the rose to look like a rose. But when it works, I LOVE IT!
You can see Tim's version here.
Pine cone to a rose...sometimes this works first time, no fiddling; other times I could just pull my hair out (not attractive!) trying to get the rose to look like a rose. But when it works, I LOVE IT!
Friday, January 11, 2013
2013...off and running
I got another chance to get into my art room and played along with Tim Holtz as he creates his January tag for the 12 Tags of 2013.
Supplies: Retro Circles embossing folder, Vial Labels, Film Strip Ribbon, silk ribbon, stamps from 'Good Thoughts', 'Calendar 1', and 'The Journey', mini Sizzix dies (butterflies, cog), game spinners, grungepaper, bulldog clip and LOTS of Ranger inks
*********************************
Medical update: We saw the oncologist today. The last biopsy showed more signs of lung cancer so my husband is no longer a candidate for surgery. We will learn next Thursday and Friday what chemo and radiation protocols will be followed and when. Fortunately this can be done locally and we won't have to travel 3-4 hours each way for surgery and follow-up treatments. Thank you all for your thoughts, concerns and prayers. The journey has just begun but we are in high spirits and have had it confirmed that yes, my dh does indeed have a heart, a brain and courage. So where is he hiding those blasted red shoes???? And those flying monkeys better not be around here...anywhere! Not nohow!
Supplies: Retro Circles embossing folder, Vial Labels, Film Strip Ribbon, silk ribbon, stamps from 'Good Thoughts', 'Calendar 1', and 'The Journey', mini Sizzix dies (butterflies, cog), game spinners, grungepaper, bulldog clip and LOTS of Ranger inks
*********************************
Medical update: We saw the oncologist today. The last biopsy showed more signs of lung cancer so my husband is no longer a candidate for surgery. We will learn next Thursday and Friday what chemo and radiation protocols will be followed and when. Fortunately this can be done locally and we won't have to travel 3-4 hours each way for surgery and follow-up treatments. Thank you all for your thoughts, concerns and prayers. The journey has just begun but we are in high spirits and have had it confirmed that yes, my dh does indeed have a heart, a brain and courage. So where is he hiding those blasted red shoes???? And those flying monkeys better not be around here...anywhere! Not nohow!
Labels:
Advantus,
Idea-ology,
Ranger,
Sizzix,
Stampers Anonymous,
Tim Holtz
Tuesday, November 27, 2012
Looking for snow
Don't know why I have this fixation for snow lately. Maybe it's because the long range weather forecast is for below normal temps with normal snow fall this winter. Unlike last year's virtually no snow and milder temps; guess it won't happen two years in a row.
Here's my #8 tag...Frosty looking for more flakes to fall. The 30th challenge over at Studio L3 is to use Tim's Reflective Imagery technique that can be found on page 55 of his 2nd book. The tag on the bag of snowflakes features the technique.
I ran the tag through the embossing folder twice; water colored the trees and background. Torn paper gives Frosty a snow mound to lean on...but you can't see much of it.
Studio 490: black and white embossing paste
Sizzix/TH: Tall Pines embossing folder, Winter Wonder die
Ranger: Glossy Accents, Multi-Medium, distress markers, distress stickles dry glitter (clear rock candy), meadow alcohol ink, sticky back metal sheets
Idea-ology: Seasonal paper stash
Advantus: fragment
Miscellaneous: ribbon, small bag of mica flakes
They say there is a 40% chance of snow tonight...I'm keeping my fingers crossed but if it does happen I doubt it will stick around for very long. Sigh.
Here's my #8 tag...Frosty looking for more flakes to fall. The 30th challenge over at Studio L3 is to use Tim's Reflective Imagery technique that can be found on page 55 of his 2nd book. The tag on the bag of snowflakes features the technique.
I ran the tag through the embossing folder twice; water colored the trees and background. Torn paper gives Frosty a snow mound to lean on...but you can't see much of it.
Studio 490: black and white embossing paste
Sizzix/TH: Tall Pines embossing folder, Winter Wonder die
Ranger: Glossy Accents, Multi-Medium, distress markers, distress stickles dry glitter (clear rock candy), meadow alcohol ink, sticky back metal sheets
Idea-ology: Seasonal paper stash
Advantus: fragment
Miscellaneous: ribbon, small bag of mica flakes
They say there is a 40% chance of snow tonight...I'm keeping my fingers crossed but if it does happen I doubt it will stick around for very long. Sigh.
Thursday, November 8, 2012
Winter wishes
Where does the time go? I almost forgot about the 27th CCC v2 challenge...alcohol inks using the ink palette. The instructions can be found on pg. 52...as indicated by the hostess with the mostess, Linda at Studio L3.
I opted to create an ATC...was pawing through my stash and had an 'ah ha' moment.
As soon as I spotted this scrap from the Seasonal Stash of cardstock, I knew I wanted to run it through the embossing folder (Seasonal Stuff 2). Green and brown distress inks were used to color the trees. See, you don't really notice the writing, do you?
A scrap of kraft resist gave me Tim's mini branch; it was inked up with brown distress inks. From a scrap of red kraft-core core'dinations the mini cardinal was born. DecoArt Snow Writer and some Clear Rock Candy Distress Stickles Dry Glitter gussy up my wintry branch.
A snippet of red silk ribbon, courtesy of Martha Stewart, got some brown distress stain on it, misted it, wadded it up, then heat set. It is threaded through an Advantus holiday token (here's where the technique comes in - Clover and Espresso alcohol inks).
This piece of work came together so quickly I couldn't believe it. And now I'm really glad I don't get rid of scraps until they are very small!
I opted to create an ATC...was pawing through my stash and had an 'ah ha' moment.
As soon as I spotted this scrap from the Seasonal Stash of cardstock, I knew I wanted to run it through the embossing folder (Seasonal Stuff 2). Green and brown distress inks were used to color the trees. See, you don't really notice the writing, do you?
A scrap of kraft resist gave me Tim's mini branch; it was inked up with brown distress inks. From a scrap of red kraft-core core'dinations the mini cardinal was born. DecoArt Snow Writer and some Clear Rock Candy Distress Stickles Dry Glitter gussy up my wintry branch.
A snippet of red silk ribbon, courtesy of Martha Stewart, got some brown distress stain on it, misted it, wadded it up, then heat set. It is threaded through an Advantus holiday token (here's where the technique comes in - Clover and Espresso alcohol inks).
This piece of work came together so quickly I couldn't believe it. And now I'm really glad I don't get rid of scraps until they are very small!
Labels:
Advantus,
core'dinations,
DecoArt,
Martha Stewart,
Ranger,
Sizzix,
Tim Holtz
Subscribe to:
Posts (Atom)


.jpg)
.jpg)
.jpg)
.jpg)
.jpg)
.jpg)
.jpg)
.jpg)
.jpg)
.jpg)
.jpg)
.jpg)
.jpg)
.jpg)
.jpg)
.jpg)
.jpg)
.jpg)
.jpg)
+(3).jpg)